How to Export Receipts Automatically to Google Sheets
In this article, we will give you an example on how to export receipts automatically from the Back Office to Google sheets, using Make.
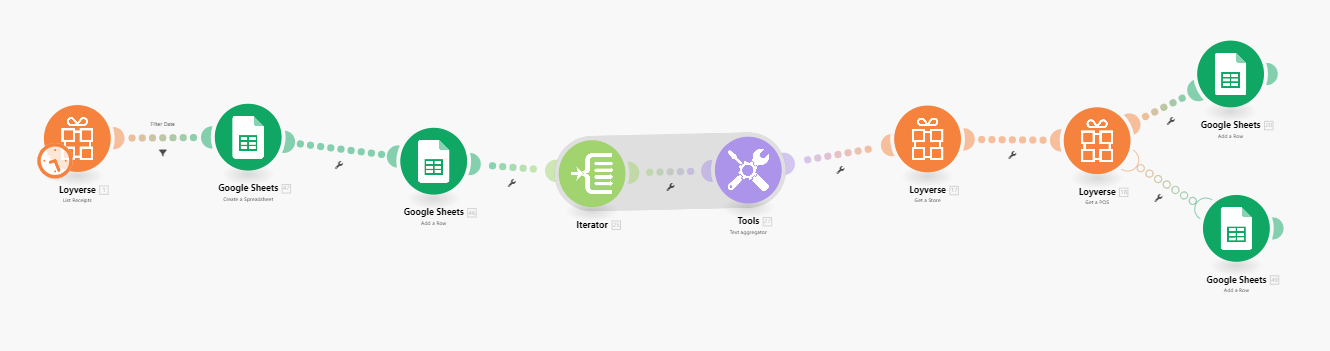
Generally, it is only needed to create an account on Make and the modules/tools that you need for this scenario are the following: Flow Control: Iterator, Tools: Text Aggregator, Get Store, Get POS, Google Sheets: Create a Spreadsheet, Google Sheets: Add a row. Next, simply go to the Make website, sign in after creating an account and click on the Create a New Scenario button and then follow the steps provided down below.
How to connect Loyverse to Make: Note that this is a general process on connecting an account of other services to Make, so the steps to add Google Sheet or Loyverse will be the same as provided here.
1. Click on the Connect App button from the Loyverse App Marketplace website.
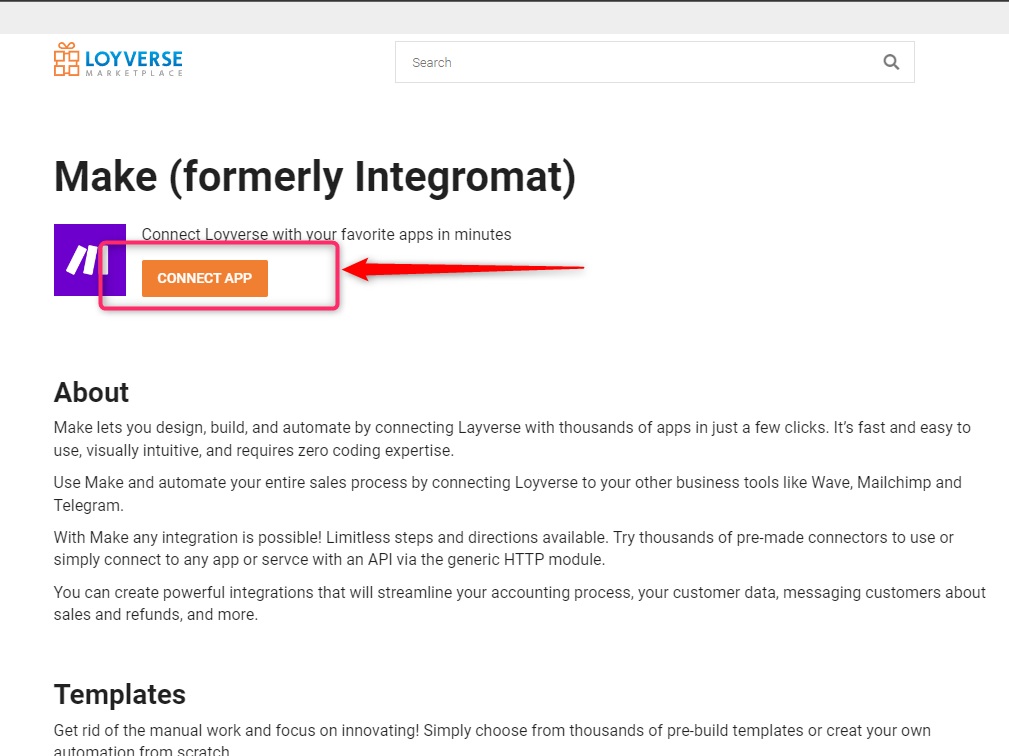
2. It will redirect you to the Make webpage to log in to your account and then will direct you to their website where you can create this scenario.
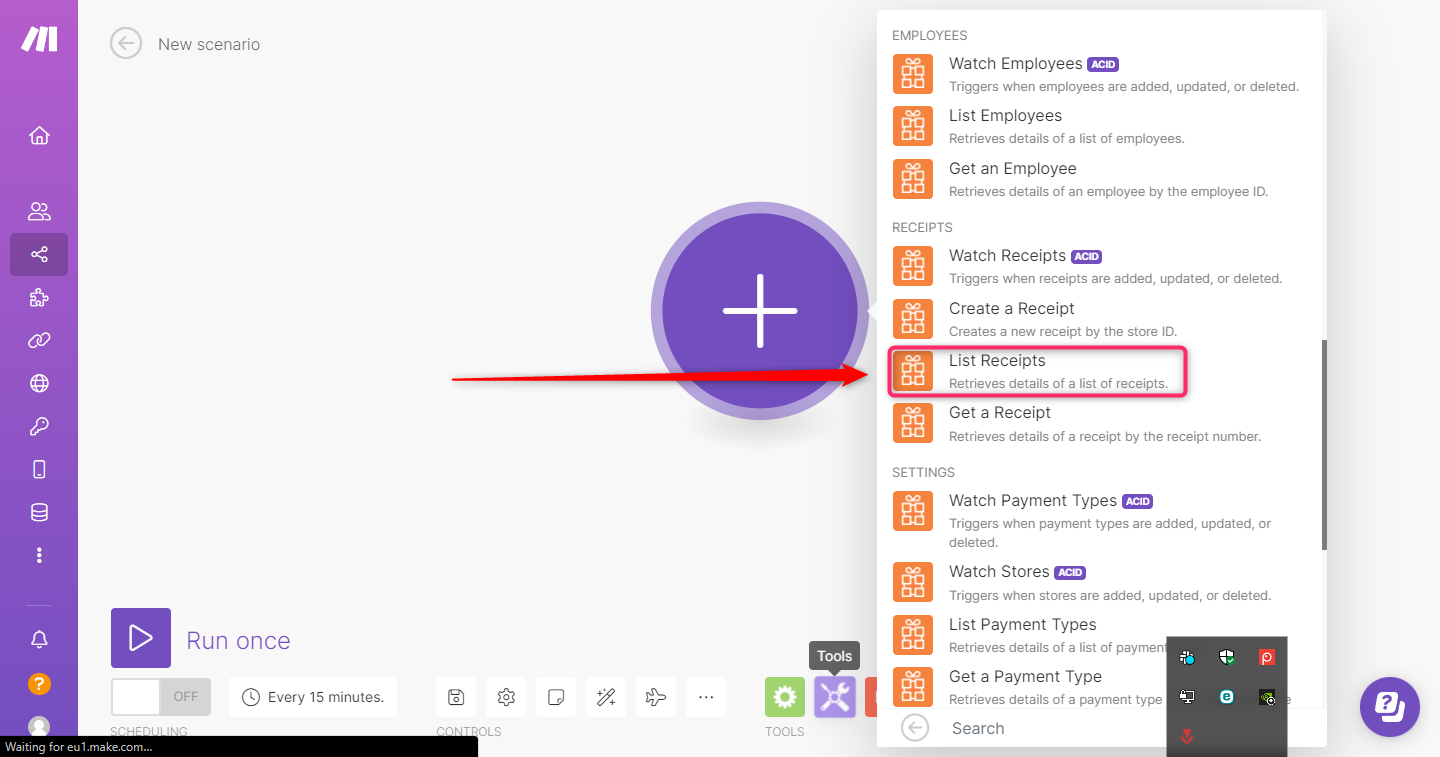
3. From the scenario page, click on the “+” button and select the List Receipts Module.
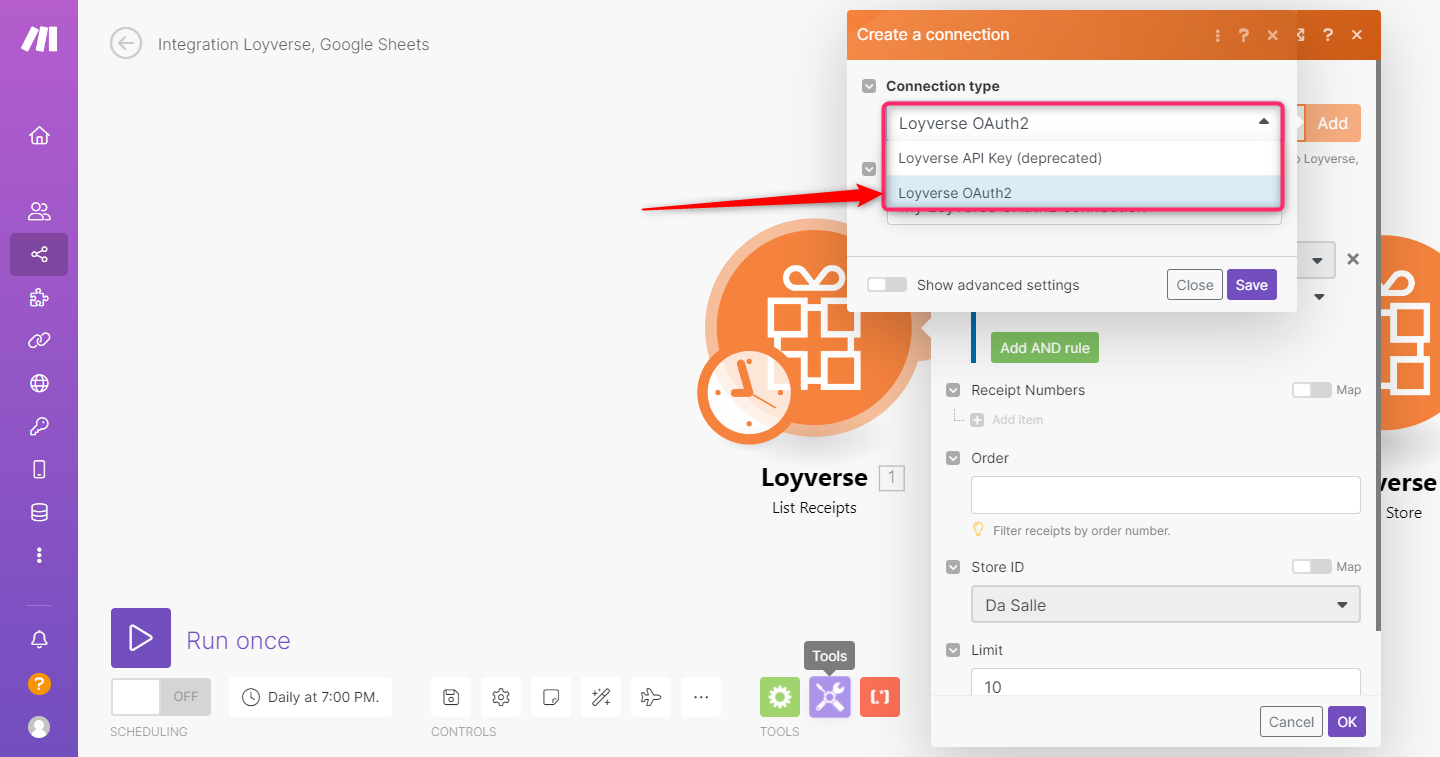
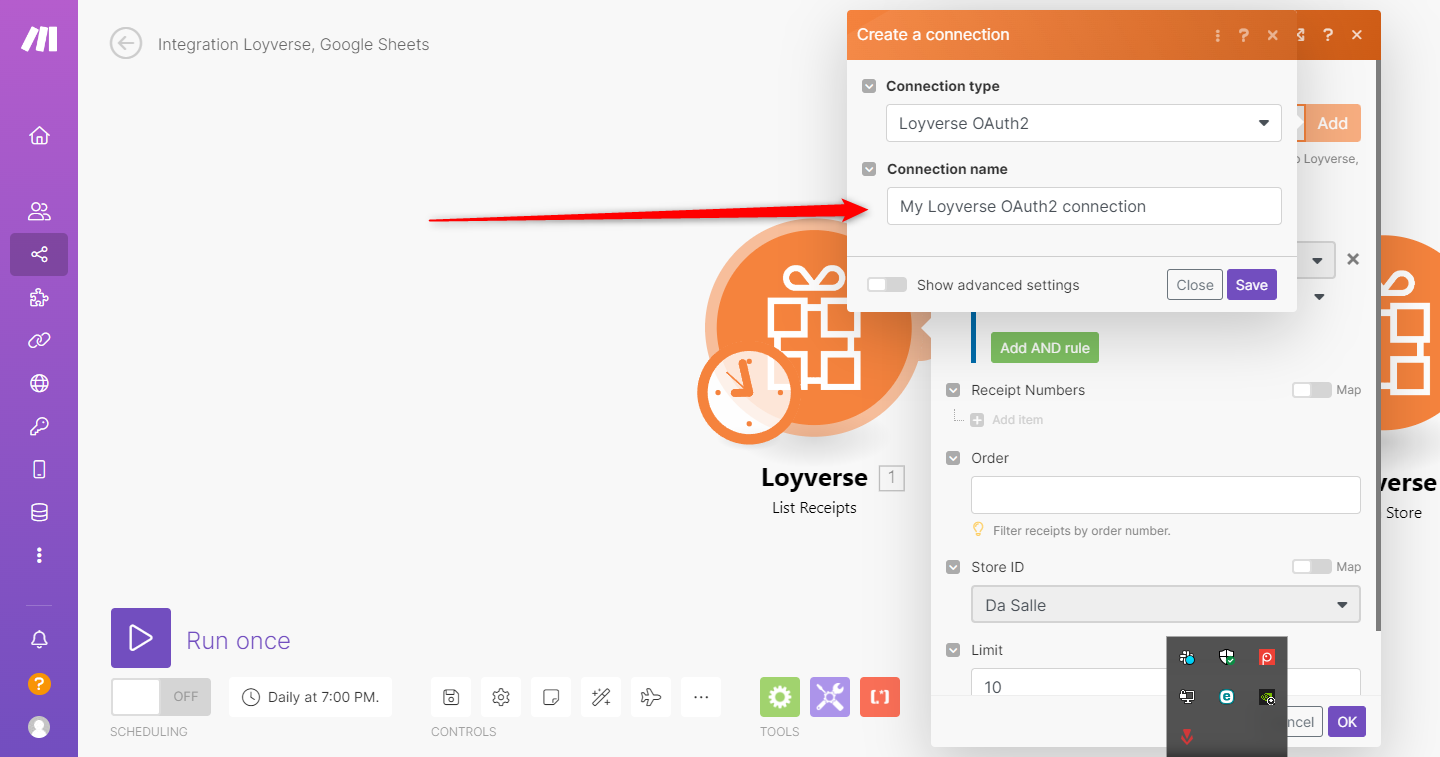
4. Next, Click on the dropdown bar button that says Connection Type. This menu will allow you to select and set up the account to connect to Make from Loyverse (or Google Sheet since they are the same process). Select the “Loyverse OAuth2.0” and then add its name and then click on save. Once you have clicked on save, it will then open another page where you will have to log in your user credentials for Loyverse and click on the Allow. The process is the same with Google Sheets as well.
5. Next add the Google Sheets Module for Create a Spreadsheet. You have to connect your Google account onto the Make first by clicking on the Add button, name the connection and then click on save. After clicking on the save button, another window will appear that leads you to Google to allow access for the information to Make.
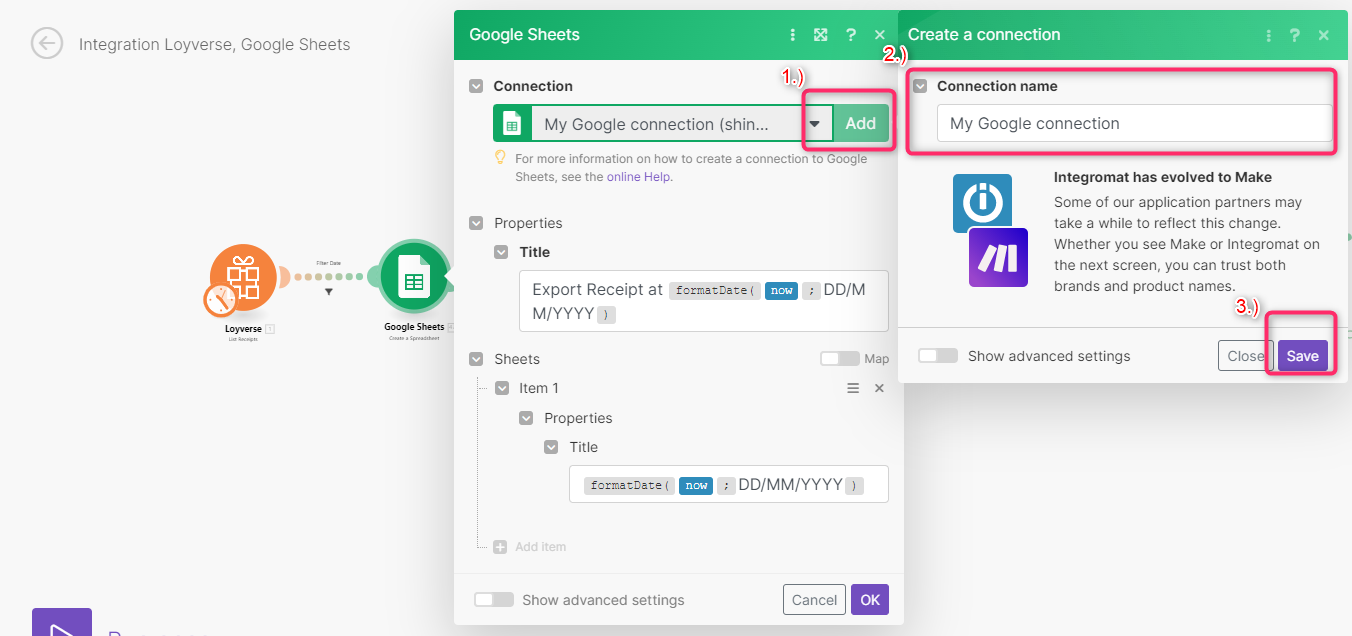
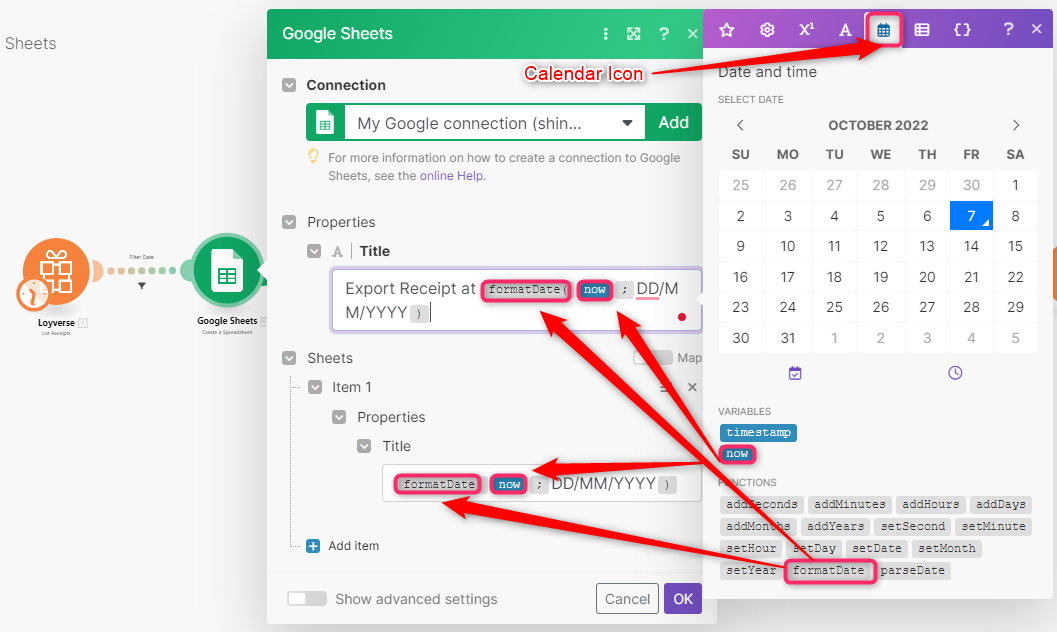
6. Fill up the field for Title of the Spreadsheet and as well the title field for spreadsheet. You can follow the naming made in the screenshots.
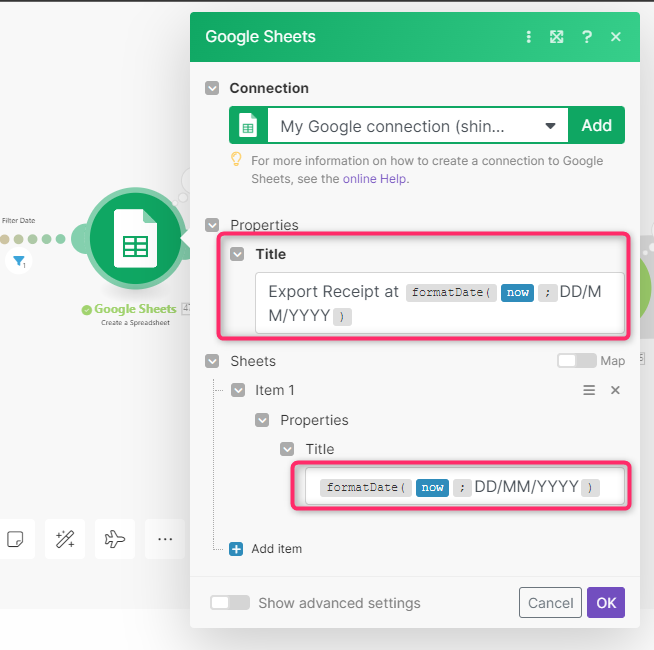
a) The following information in the screenshot provided above can be found in the pop up window that will appear once you click on the field. To do this, click on the Calendar Icon and then select the formatDate and now then type the date format that you’d like for them to appear:
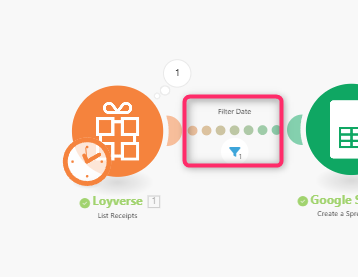
7. Since we have established connection, we can now set a filter for the List Receipts module so that our scenario knows what data needs to get in or not. Click on the dotted line or link and a pop up window will appear that has the field of condition.
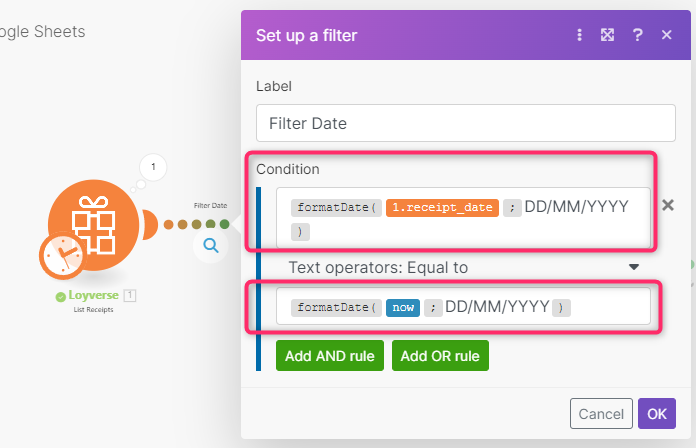
8. From the Condition Field, fill it up with the information of the receipt date that came from the List Receipt and the Calendar. Use the format date function to change the format of the date to the format of DD/MM/YYYY (note: this can be in any format that you desire but please make the format the same as possible on all the fields.).
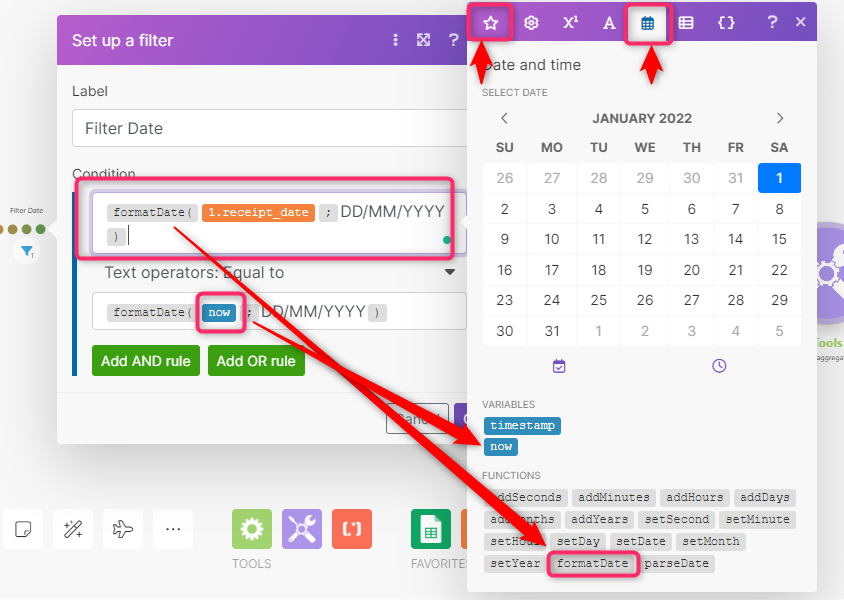
9.To find and fill the condition field of formatDate, receipt_date, and now like in the picture provided, you will have to click on the field and another pop up window appear. Just like in the screenshot, you are able to fill out the field and add the formatDate, receipt_date and now under the Calendar Icon, click on the Star Icon and from there, you can find the receipt_date.
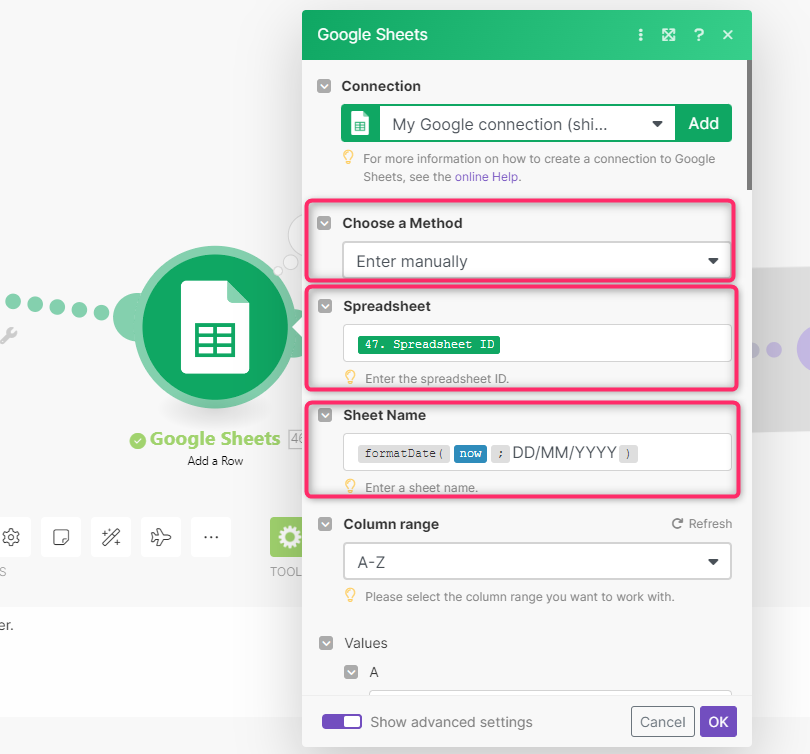
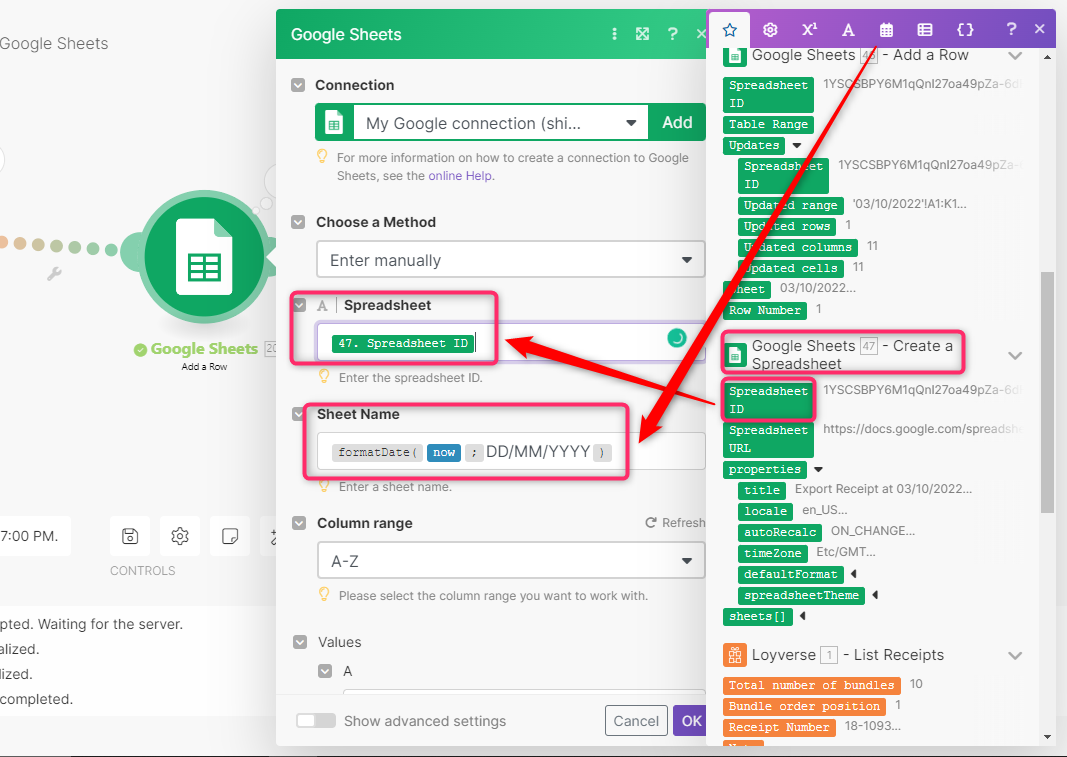
10. Next, add the Google Sheets Module for Add a Row after the Create SpreadSheet Module. In this module, you will need to change the Choose a Method field to Enter Manually. The Select from the list does not allow you to add Spreadsheet ID that is why you need to set it to Enter Manually. Then in the Spreadsheet field, select the Spreadsheet ID and fill the Sheet Name the same as the screenshot. (Note: It is important to be mindful in order to avoid any error, the name of the Sheet entered here should match and be the same with what you entered in step 6).
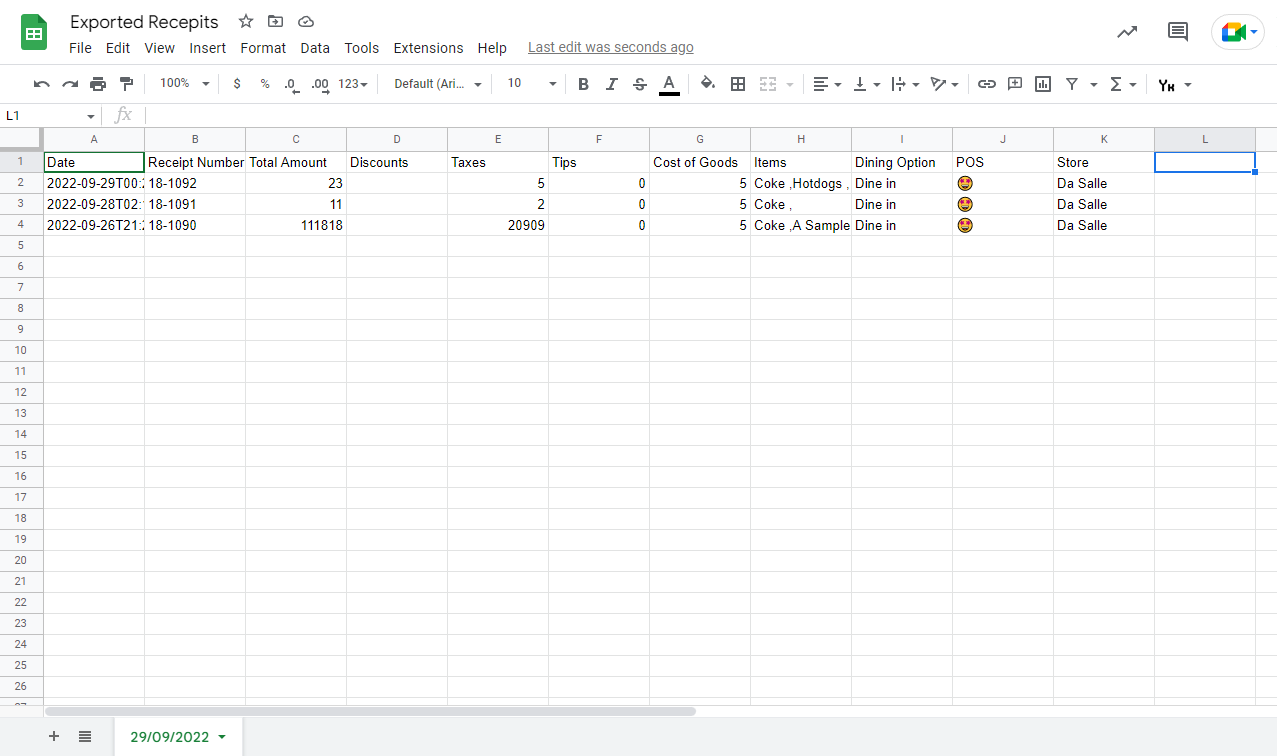
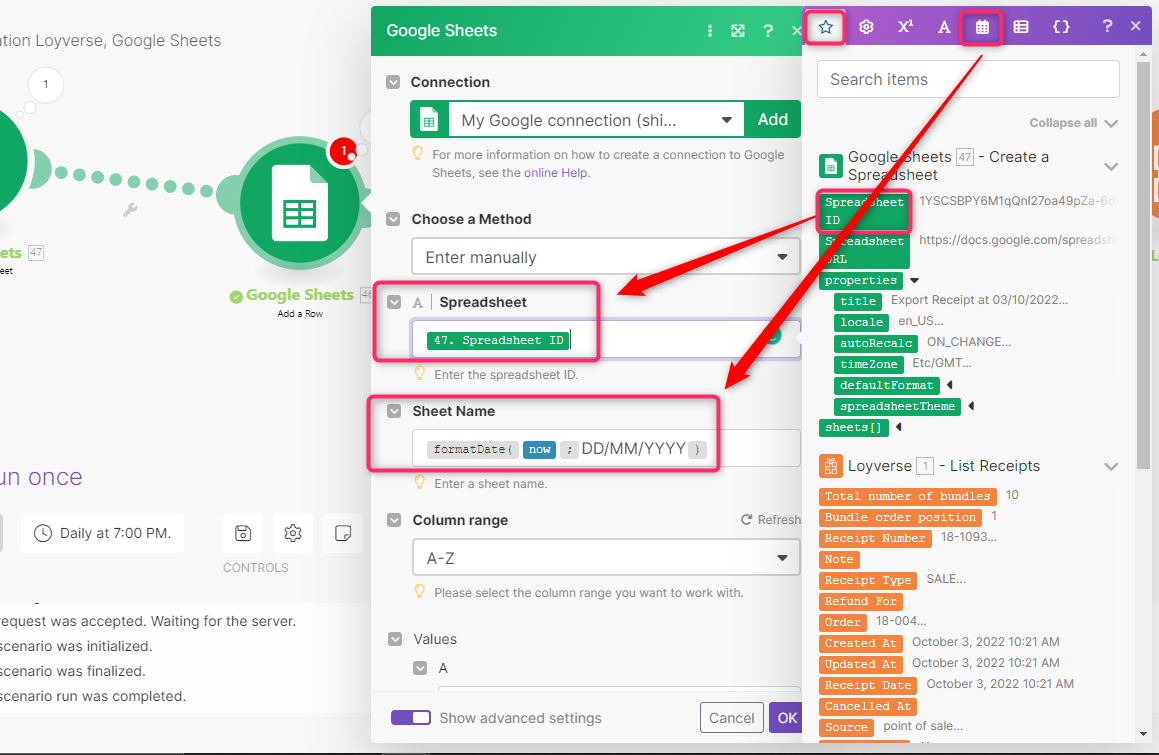
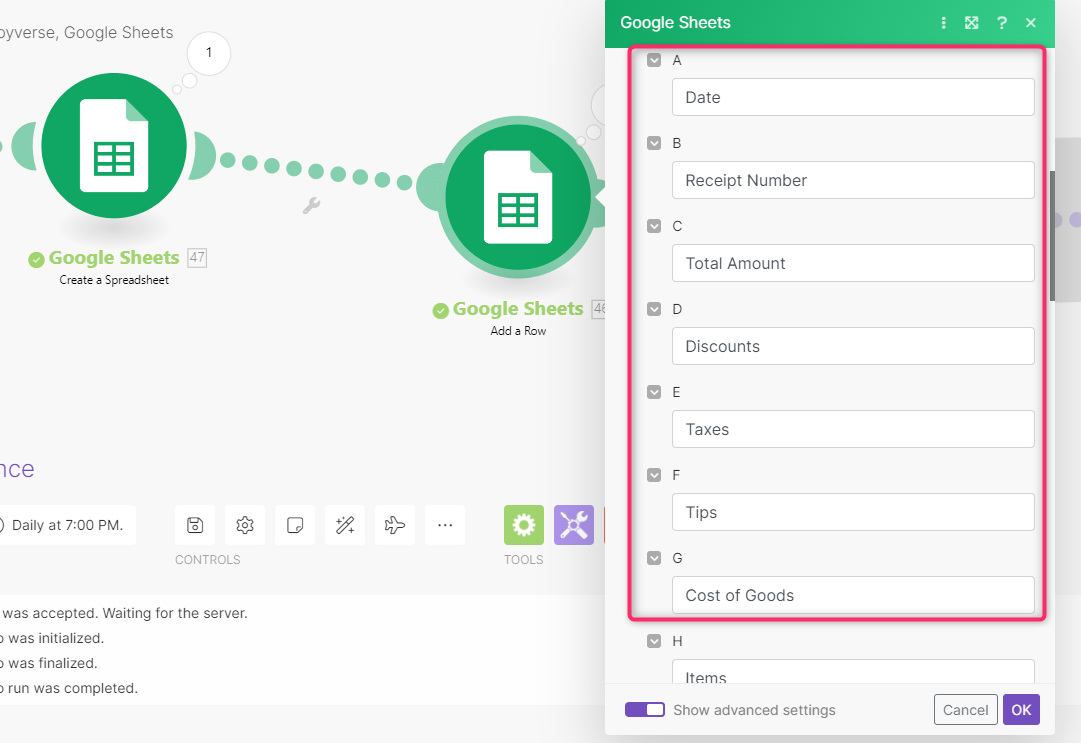
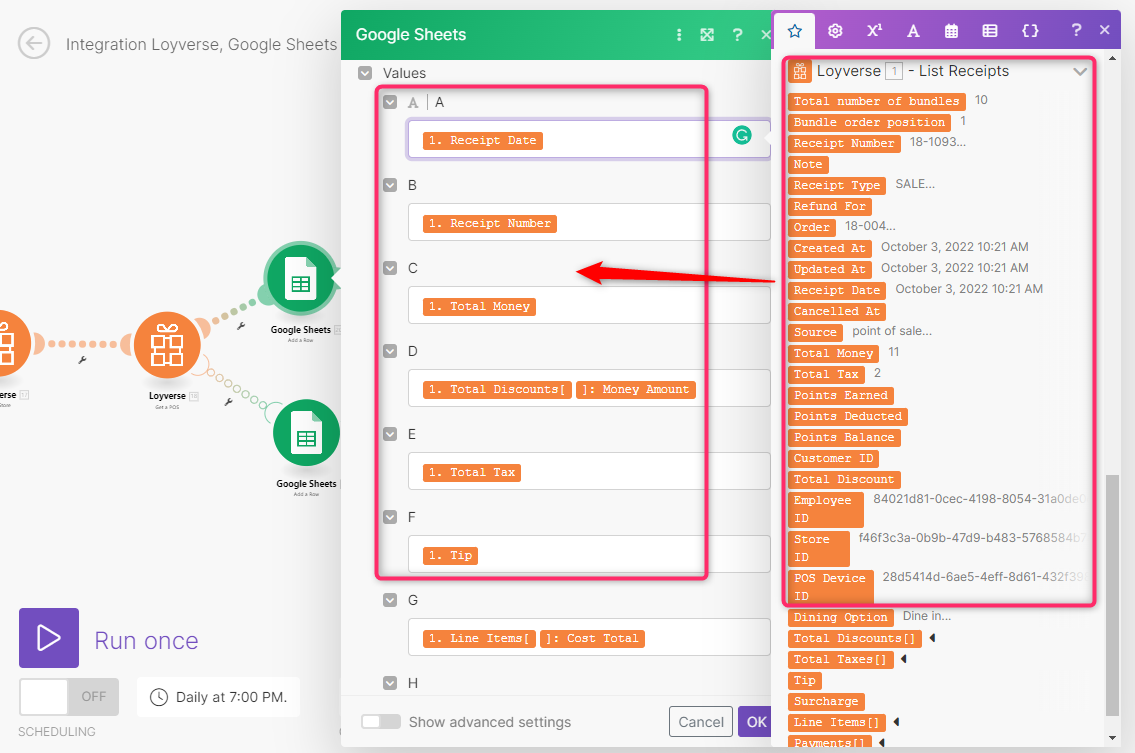
11. To find the Spreadsheet ID, click on the field, click on the Star Icon and find the Spreadsheet ID. And for the Sheet Name, you can go to the Calendar Icon to do the same. Scroll down and fill out the remaining fields in the following manner: Date, Receipt Number, Total Amount, Discount, Taxes, Tips, Cost of Goods, Items, Dining Options, POS, Stores. Note: This is customizable depending on the preference.
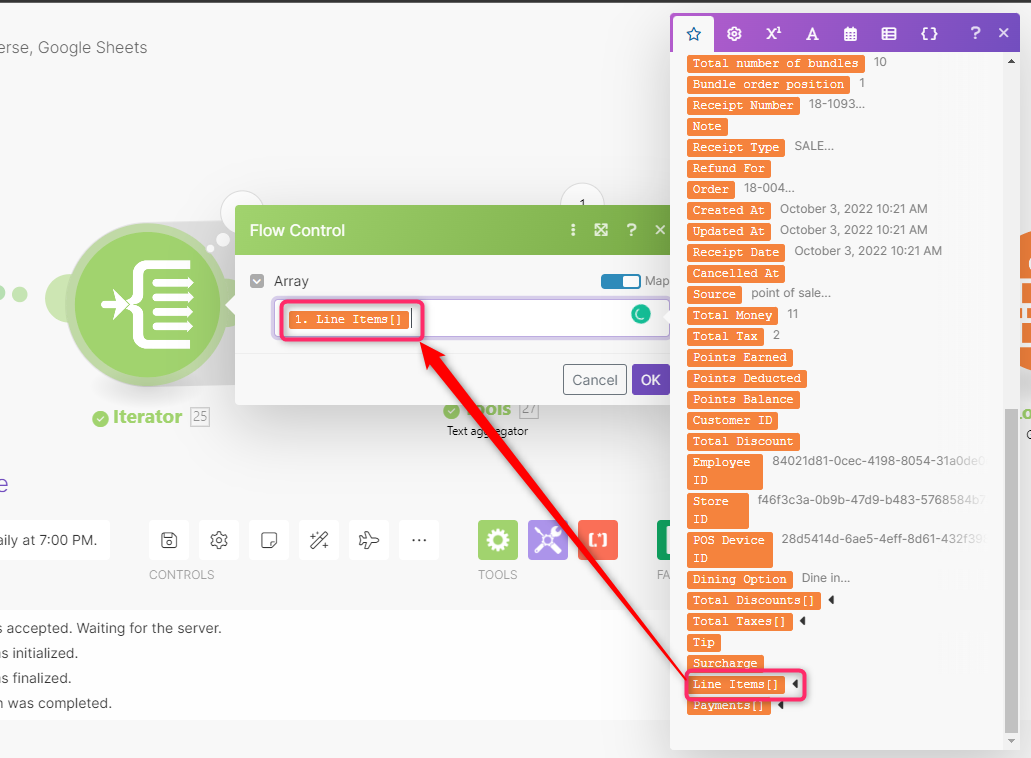
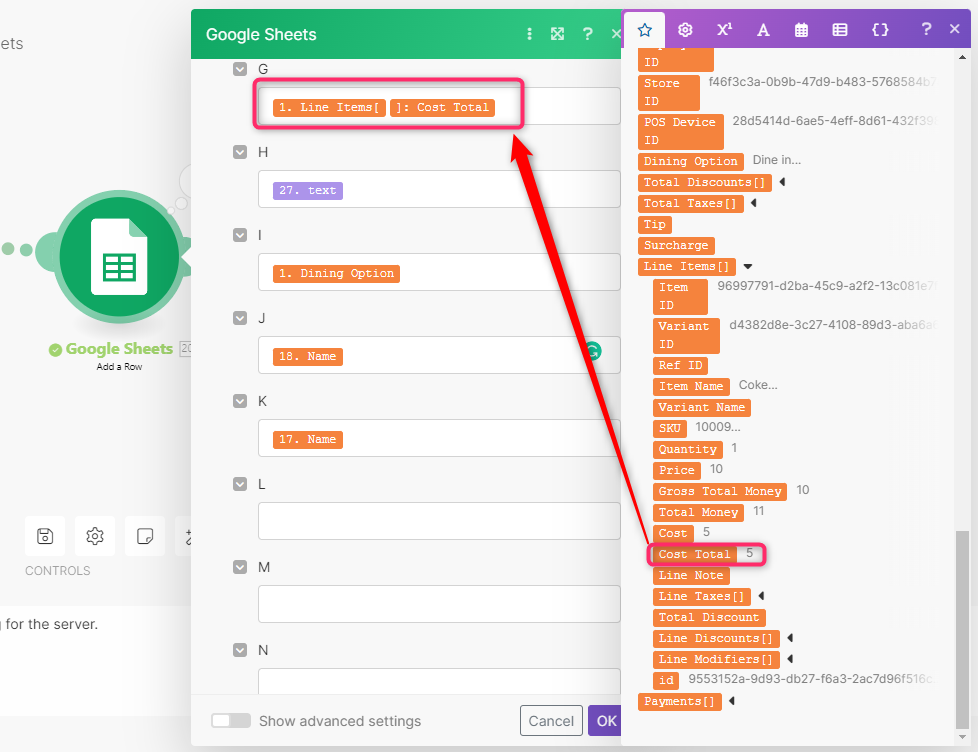
12. Next, add the module Flow Control: Iterator. After adding and connecting the Module, open its menu and add the information that has the name of “Line Items[]” specifically. And then click OK.
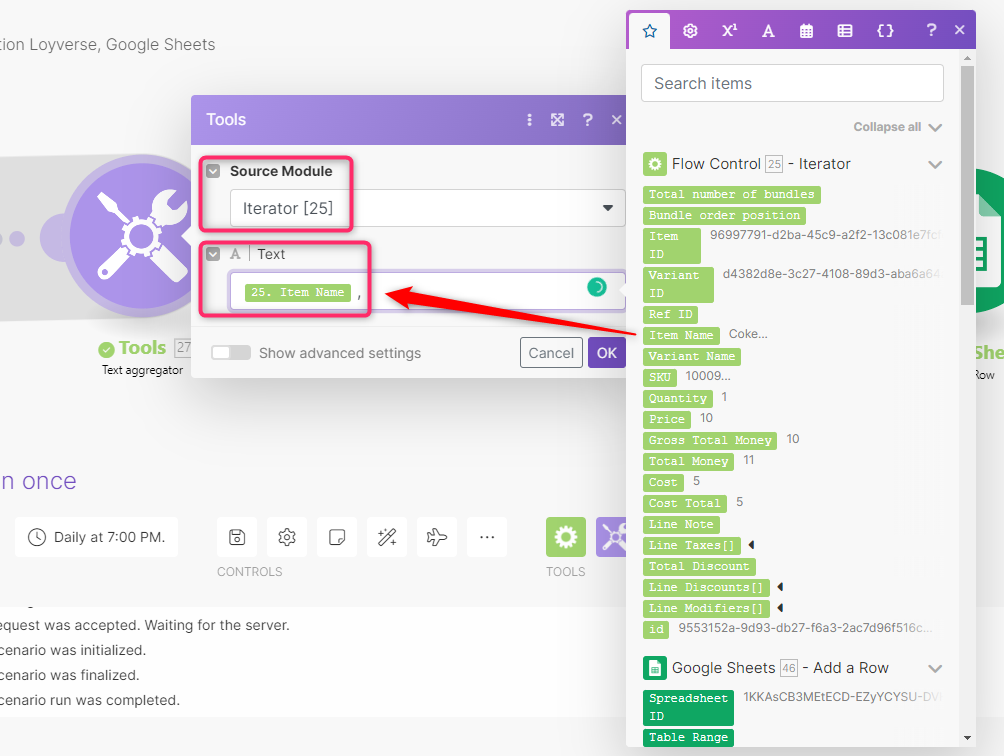
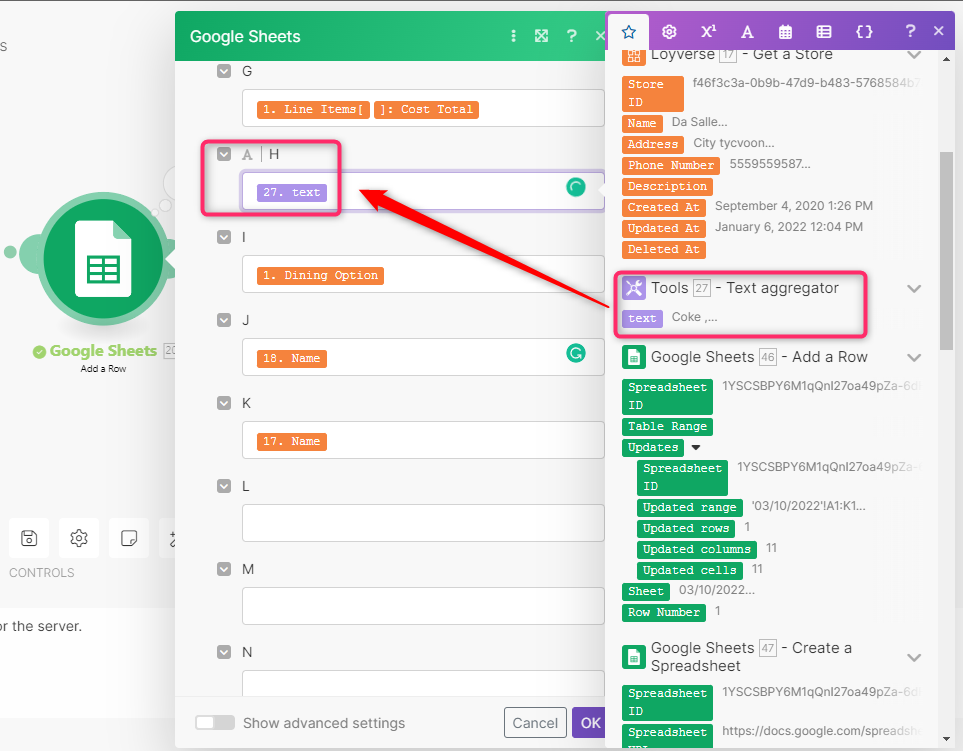
13. Afterwards, add the module Tools: Text Aggregator. This will combine all the information of the Line Items into 1 cell. In its Source Module field, select Iterator[n] to target the Iterator module set up earlier, then in the Text Field, Click on the field and select the Item Name from the Flow Control Module like in the screenshot. And then Click OK.
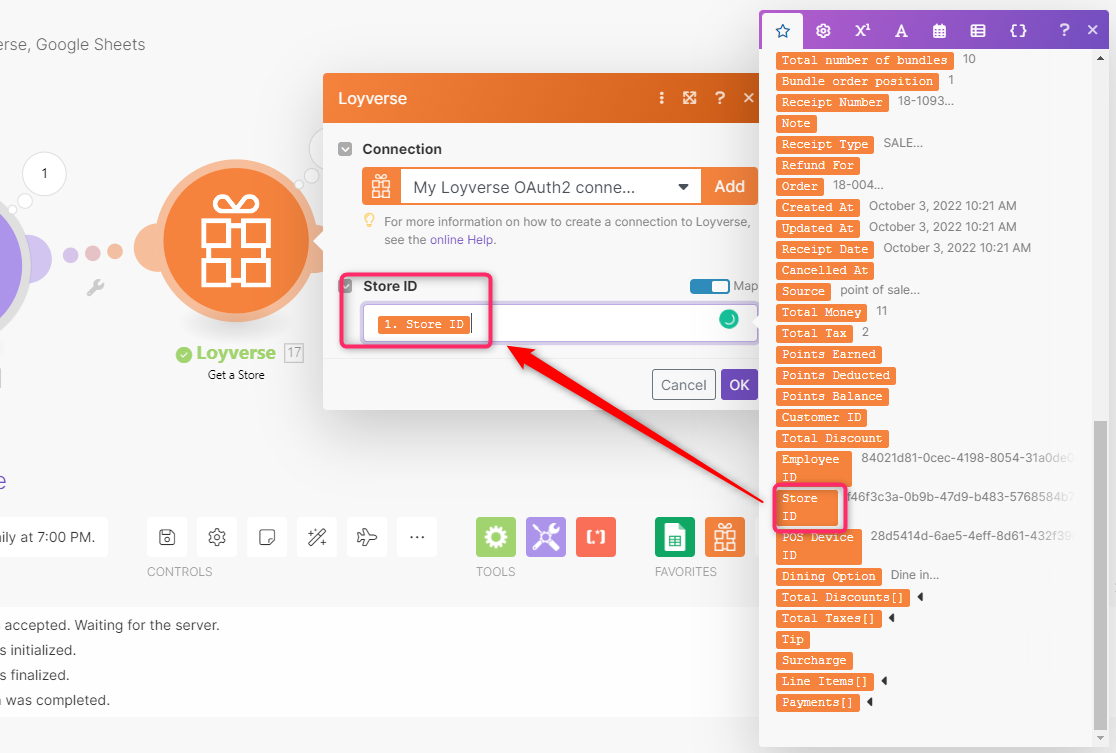
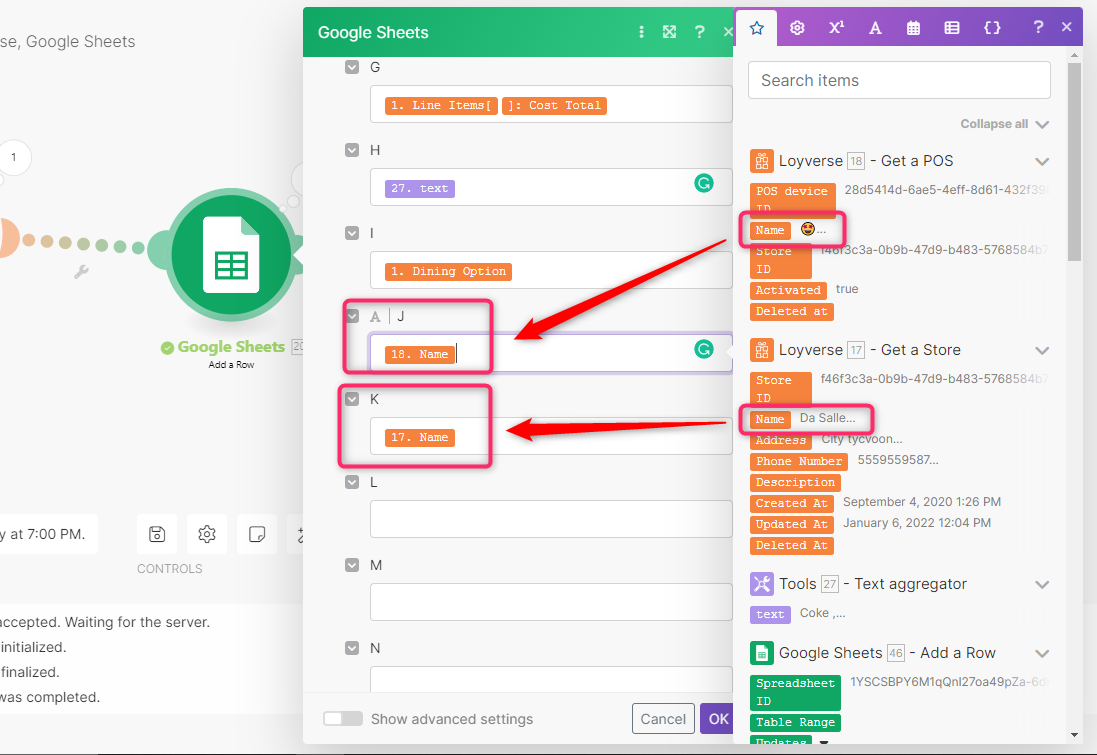
14. Next, add the Get a Store Module to get the name of the store from Loyverse instead of some random words. In the Store ID field, look for the List Of Receipts. From there, find the Store ID and place it into the field. And then click OK.
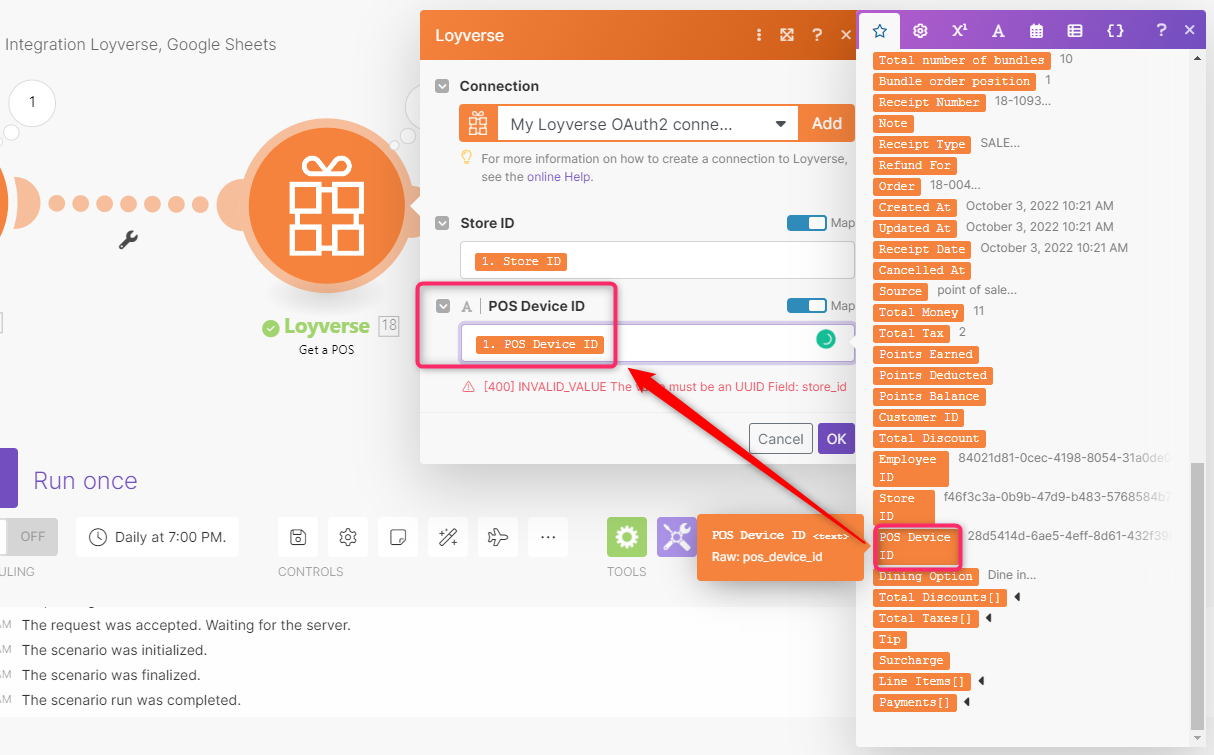
15. Next, add the Get a POS module, this will allow you to be able to get the name of the POS. In the same manner on how to find the Store ID to put in the field, you can find the POS Device ID and place it in the POS Device ID field. And then click on OK.

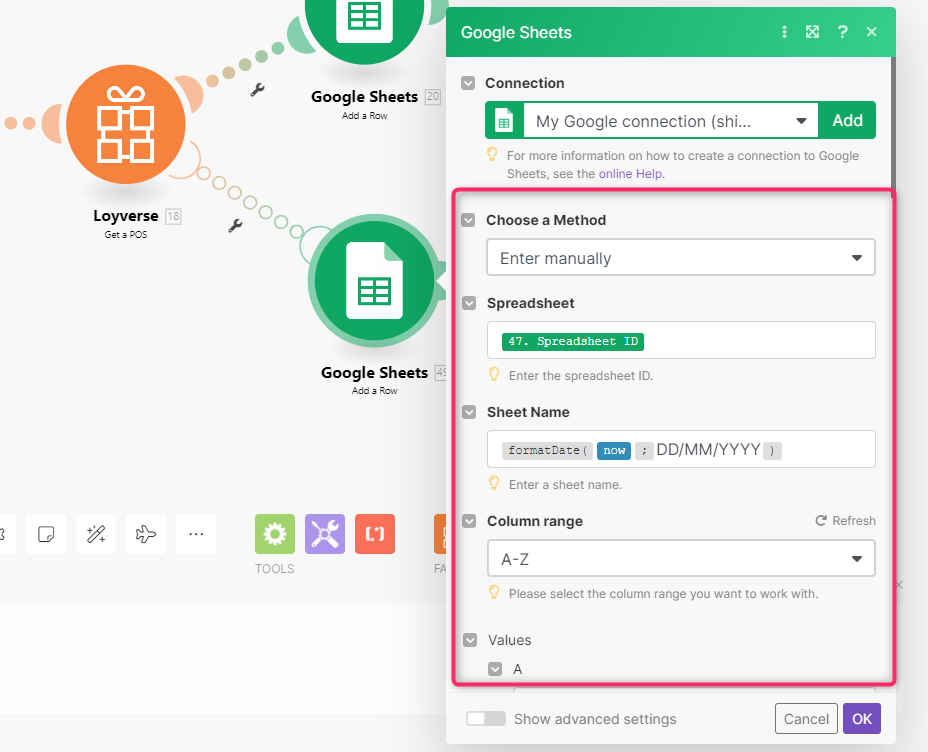
16. Then, lastly, you can add the Add a Row Module again in order to send receipts in the Google Sheet. Again, set the Choose a Method Field to Enter Manually, Fill the Spreadsheet Field with the Spreadsheet ID, from the Google Sheets: Create a Spreadsheet Module in the Star Icon, then fill out the Sheet Name field exactly with the previous google spreadsheet modules. Note: The Spreadsheet Name should be exactly the same as what you have entered in the previous Add a row Module. Otherwise, an error will occur.
17. Then, scroll down the window to fill out the following fields of rows as follows in the screenshot provided. Note: In the receipt_date, the date it represents is not formatted to the date that you are expecting. If you wish to format it to your actual date that you are expecting then you can encase the receipt_date with the funcion: formatDate(receipt_date;DD/MM/YYYY HH;mm; timezone*)
18. If you’d like to also catch errors when the scenario returns an error in the Get a POS Module, right click the bubble of the Get a POS module and click on the Add an Error Handler button. The make will deviate and create a new path for you to do the following:
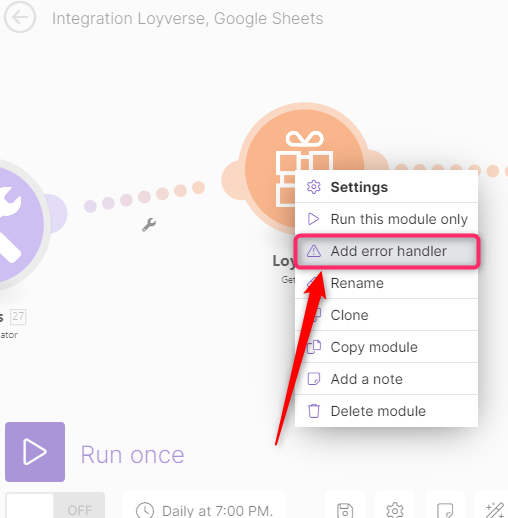
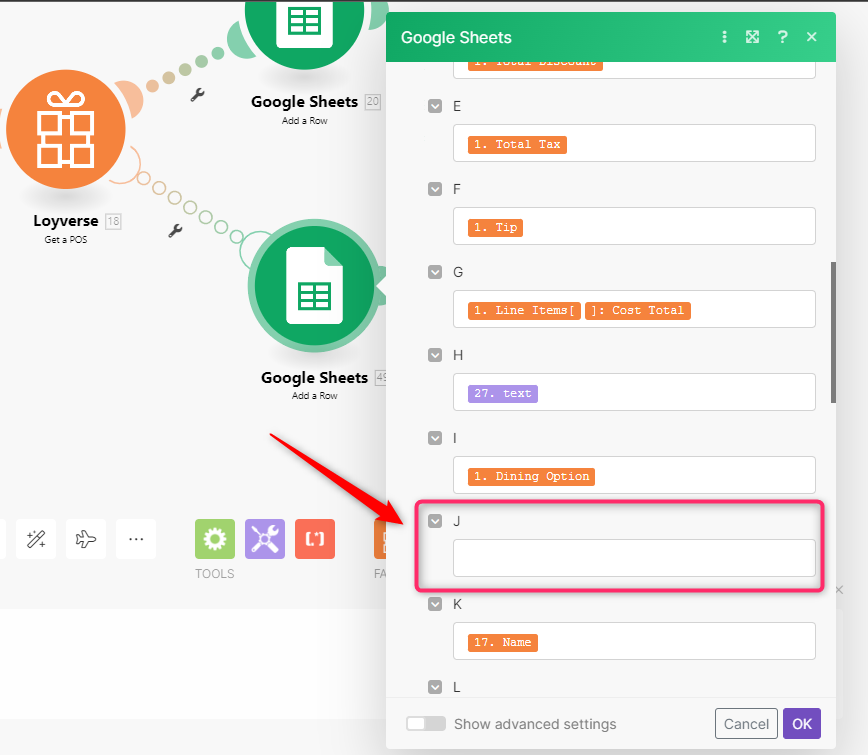
a) Creating and adding another Add a Row module that is created exactly the same way with step 11 to 12.
b) Except that in the last part, remove the POS Name or do not add it and leave it blank. That way, there will be no more errors.
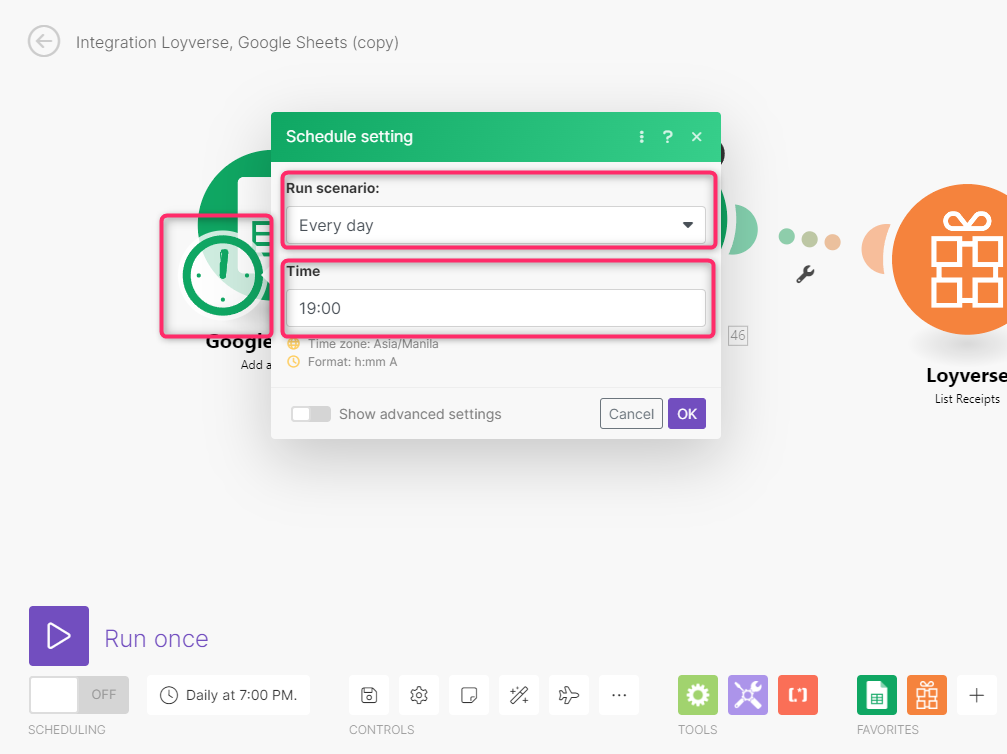
19. Then, you can use Make’s features to make the work of this scenario automated. This is entirely up to the user’s preference so in this example, the scenario for this is to run this everyday at 7:00 pm:
20. Run the scenario once to check if everything is in order and no error appears and this is what it should look like as a result: